New Google Identity in Nuxt 3
New Google Identity installation for Nuxt 3 with credentials verification in fastify.


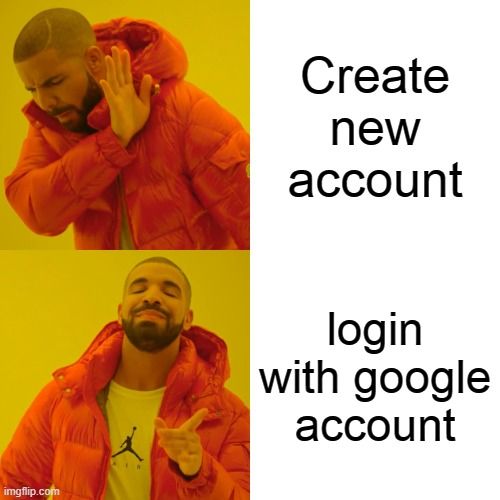
I was scared today because two great libraries did not work with Google Sign In for Nuxt 3. I mean auth.nuxtjs and nuxt-vue3-google-signin.
From stack overflow

I learned that first one is incompatible with nuxt 3, but it is planned on roadmap
Second simply could not work giving error that was suggesting that something is wrong with my client id.
I checked official Google Docs and see this:
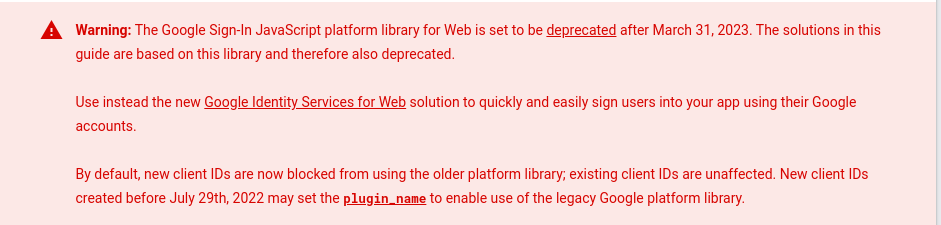


Looks terrible, but hepilly I integrated google sign in button quite fast without external libs. In this article I will show how to implement new Google Identity with Nuxt 3.
Google Identity - how it is different
Because image is worth more than thousand of words, new login button contains avatar:

Sign In button HTML
To add it to your component you will need paste below html
  <div id="g_id_onload"
       :data-client_id="config.public.googleClientId"
       data-context="signin"
       data-ux_mode="popup"
       data-callback="googleLoginCallback"
       data-auto_select="true"
       data-itp_support="true">
  </div>

  <div class="g_id_signin"
       data-type="standard"
       data-shape="pill"
       data-theme="outline"
       data-text="continue_with"
       data-size="large"
       data-logo_alignment="left">
  </div>
or prepare your own in configurator

There are three elements that we have to connect:
config.public.googleClientId- google client IDgoogleLoginCallback- globally defined function that will get results of login- google library that will make these buttons working
Passing .env to Nuxt 3
To pass .env to nuxt 3 you can follow this answer
You create .env file with
GOOGLE_CLIENT_ID=xxx.apps.googleusercontent.com
to connect these values you can use dotenv library, but I prefere Makefile like this one
include .env
export

node_modules: package.json
	npm i

up: node_modules
	npm run dev
In nuxt config you should add
export default defineNuxtConfig({
    runtimeConfig: {
        public: {
            googleClientId: process.env.GOOGLE_CLIENT_ID ?? '',
        }
    },
})
and finally in component you can get access to config by
const config = useRuntimeConfig()
Extending window by callback function
Window by default do not have googleLoginCallback so to add it you should create file types/global.d.ts with
declare global {
    interface Window {
        googleLoginCallback: () => void;
    }
}
and in component add
if(process.client) {
  window.googleLoginCallback = (...args) => {
    console.log(args);
  }
}
Load the client library in Nuxt 3
Google mentions about this step on page
But you should not add
<script src="https://accounts.google.com/gsi/client" async defer></script>
in nuxt3, Instead use this code in your component:
useHead({
script: [{
async: true,
src: 'https://accounts.google.com/gsi/client',
defer: true
}]
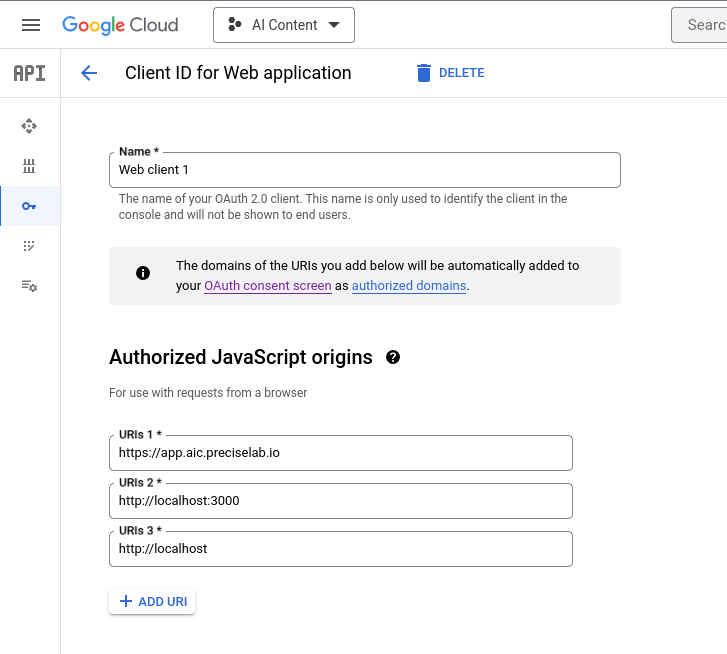
})Now you should see login button. You should be able to click on it, login and see credentials in console. Assuming that you correctly configured OAuth 2.0 Client
And added localhost to Authorized JavaScript origins
After login in console you will see array with single object like this
{
  clientId:"xxx.apps.googleusercontent.com"
  client_id:"xxx.apps.googleusercontent.com"
  credential: "token"
  select_by:"auto"
}
Credentail token is JWT with payload
{
  "iss": "https://accounts.google.com",
  "nbf": 1676544985,
  "aud": "xxx.apps.googleusercontent.com",
  "sub": "108561822785941523583",
  "email": "gustaw.daniel@gmail.com",
  "email_verified": true,
  "azp": "xxx.apps.googleusercontent.com",
  "name": "Daniel Gustaw",
  "picture": "https://lh3.googleusercontent.com/a/AEdFTp64X-0imH5xey6U4JDKzFRrMXdtg4lGy8GlEjLxyQ=s96-c",
  "given_name": "Daniel",
  "family_name": "Gustaw",
  "iat": 1676545285,
  "exp": 1676548885,
  "jti": "a7e1afd716925de385bf0069c7c370f8e64580d3"
}
To verify it you should send it to backend.

Backend verification for Google credential
As backend we can use fastify. I described fastify config on this blog here
 Daniel Gustaw
so now I assume you have done step "Add Fastify with first endpoint" from this article.
In fastify.ts we can add line with path
app.post('/google-verify', Auth.googleVerify)and in routes/Auth.ts define static function googleVerify.
So in googleVerify we will to check if credentials are correctly created by google.
Checking credentials authenticity
To verify we need install google package on backend according to instruction
npm install google-auth-library --save
we need the same GOOGLE_CLIENT_ID in backend .env
GOOGLE_CLIENT_ID=xxx.apps.googleusercontent.com
in file with controller - routes/Auth.ts we can write our function as
import {FastifyRequest} from "fastify";
import {OAuth2Client} from 'google-auth-library';

export class Auth {
  static async googleVerify(req: FastifyRequest<{ Body: { credential: string } }>) {
    const client = new OAuth2Client(process.env.GOOGLE_CLIENT_ID);
    const ticket = await client.verifyIdToken({
      idToken: req.body.credential,
      audience: process.env.GOOGLE_CLIENT_ID,
    });
    const payload = ticket.getPayload();
    if(!payload) throw new Error(`No payload`);

    console.log(payload);
    return payload;
  }
}
and now update frontend part. First global.d.ts
interface GoogleAuthenticatedResponse {
    clientId: string
    client_id: string
    credential: string
    select_by: "auto"
}

declare global {
    interface Window {
        googleLoginCallback: (userData: GoogleAuthenticatedResponse) => void;
    }
}
next add API_URL to .env, then add apiUrl to runtimeConfig like googleClientId, finally we can write callback function in nuxt3 component in form:
if(process.client) {
  window.googleLoginCallback = (userData) => {
    console.log("ud", userData);
    axios.post(config.public.apiUrl + '/google-verify', {
      credential: userData.credential
    }).then((res) => {
      console.log("pl", res.data)
    }).catch(console.error)
  }
}
Enable Cors in Fastify
we forgot about cors

so quick fix
npm i @fastify/cors
and in src/fastify.ts
import cors from '@fastify/cors'

//...

    app.register(cors)
and we can see in console all user's details

We do not want to call await client.verifyIdToken( on any request so we have to exchange google JWT for our own, so it is worth to create user in your database and generate jwt token for him, but I described this in mentione before article:
Daniel Gustaw