Fetch, Promise and Template String on example of To Do List in JavaScript
This simple project is great as an introduction to JavaScript programming. The emphasis is on ES6 elements and the frontend.


This simple project learn you how to apply interface fetch , shows examples of usage of promises and some interesting css properties like transform , user-select or directive @media.
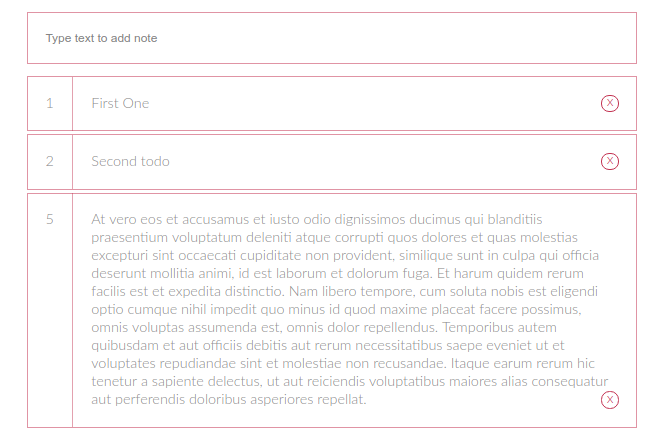
After finishing project will looks following:
Text was initially posted in polish language nearly one year ago and and for polish reader is still available here:
> https://gustawdaniel.com/fetch-promise-oraz-string-templates/
You can see all source code under link
> https://github.com/gustawdaniel/simple-todo-app-js-tutorial
Installation
If you want to test code on your computer without rewriting it, simplest way is download release by command
wget -qO- https://github.com/gustawdaniel/simple-todo-app-js-tutorial/archive/1.0.tar.gz | tar xvzNext go to created directory
cd simple-todo-app-js-tutorial-1.0 Now you should install dependencies
npm iTo setup servers we will need two terminals. In firs one we run server with our projct
node node_modules/http-server/bin/http-serverIn second terminal ctrl+n we setup REST API server provided by json-server package.
node node_modules/json-server/bin/index.js --watch db.jsonIf everything works we should see something like this
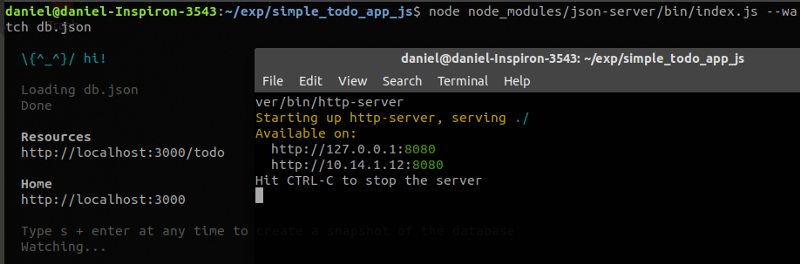
Website should be available on address localhost:8080
Structure of project
Project contains the following files
├── app.js              // script providing creating, reading and deleting tasks
├── db.json             // json file with data that is connected with REST API
├── index.html          // html file with main page
├── LICENSE             // licencje WTFPL
├── package.json        // file with dependencies (servers: http and json)
├── README.md           // documentation for end user
└── style.css           // style
You can see that project is really simple. Page make possible following actions:
- creating tasks
- displaying tasks
- removing tasks
In next chapter we describe content of static files index.html and style.css . Next we discuss servers that we setup, role of db.json file and at the end logic placed in file app.js .
Static document
File index.html starts in quite classic way. We downloading font Lato and attaching our custom style.
<html>
<head>
<link href="https://fonts.googleapis.com/css?family=Lato:300&subset=latin-ext" rel="stylesheet">
<link rel="stylesheet" href="style.css">
</head>Because of code typed is in agreement with rules of HTML5 semantics we have division on header and main . In header there is form with one field to type text of task.
<body>
<header>
    <form class="todo">
        <input name="task" type="text" placeholder="Type text to add note">
    </form>
</header>
In part main there is list with three exemplary elements. Elements has his own identifiers and are divided on two parts. First one contains identifier, second text and button to deleting task.
<main>
  <ul>
    <li data-id="1">
      <div class="list-elem-head">
          <span class="id">1</span>
      </div>
      <div class="list-elem-body">
          <span class="text">First One</span>
          <span class="delete">x</span>
      </div>
    </li>
    <li data-id="2">
      <div class="list-elem-head">
          <span class="id">2</span>
      </div>
      <div class="list-elem-body">
          <span class="text">Second todo</span>
          <span class="delete">x</span>
      </div>
    </li>
    <li data-id="5">
      <div class="list-elem-head">
          <span class="id">5</span>
      </div>
      <div class="list-elem-body">
          <span class="text">At vero eos et accusamus et iusto odio dignissimos ducimus qui blanditiis praesentium voluptatum deleniti atque corrupti quos dolores et quas molestias excepturi sint occaecati cupiditate non provident, similique sunt in culpa qui officia deserunt mollitia animi, id est laborum et dolorum fuga. Et harum quidem rerum facilis est et expedita distinctio. Nam libero tempore, cum soluta nobis est eligendi optio cumque nihil impedit quo minus id quod maxime placeat facere possimus, omnis voluptas assumenda est, omnis dolor repellendus. Temporibus autem quibusdam et aut officiis debitis aut rerum necessitatibus saepe eveniet ut et voluptates repudiandae sint et molestiae non recusandae. Itaque earum rerum hic tenetur a sapiente delectus, ut aut reiciendis voluptatibus maiores alias consequatur aut perferendis doloribus asperiores repellat.</span>
          <span class="delete">x</span>
      </div>
    </li>
  </ul>
</main>
At the end we attaching script, which we describe later. Now it can be empty file.
<script src="app.js"></script>
</body>
</html>
CSS file
If not styling, then looking on this page would cause nightmares. But inspired by lectures from html and css that I provided last time I decided type css file from scratch. The rules that I have added begin with determining the width of the document depending on the width of the screen. Most frequently I using bootstrap to this purpose, but you can do it without it. This is served by the @media directive, the use of which is presented below:
@media (max-width: 575px) {
    input,main {
        width: 100%;
    }
}
@media (min-width: 576px) {
    input,main {
        width: 80%;
    }
    main {
        margin-left: 10%;
    }
}
You can see that on biggest devices we want to have margin, which on smaller is not necessary. Next rule is applying font Lato to all document
body {
    font-family: 'Lato', sans-serif;
}
In header we centering form and removing his natural margins
header {
    text-align: center;
}
form {
    margin: 0;
}
Next, we define the rules for highlighting the input to which we will click or over which we will have mouse. We removing the transparency from the frame and adding fuzzy shadow and red background.
input:focus, input:hover {
    border: solid 1px crimson;
    box-shadow: 0 0 5px -1px crimson;
    background-color: rgba(220, 20, 60, 0.05);
}
Now we can see on not selected input.
input {
    padding: 20px;
    border: solid 1px rgba(220, 20, 60, 0.52);
    margin: 10px 0;
    transition: box-shadow 1s, background-color 2s;
}
Interesting property of not selected input is transition . It allows to define delay of shadow and background changes. Thank to transition we can see smooth vanishing and appearing of these properties.
Analogical effects we want to apply to list elements. Most standing out element is moving left border of list on the right what we set in property margin .
li:hover {
    border: solid 1px rgba(220, 20, 60, 0.8);
    background-color: rgba(220, 20, 60, 0.05);
    box-shadow: 0 0 2px -1px crimson;
    margin: 3px 0 3px 10px;
}
For comparison if mouse not hovered list element then margin is symmetric. There applied transition too obtaining animation of indenting and ejecting a list item.
li {
    list-style: none;
    border: solid 1px rgba(220, 20, 60, 0.52);
    margin: 3px 0;
    color: gray;
    transition: margin 0.5s, background-color 2s;
}
Elements of the list are divided into two parts, .list-elem-head is used to display the identifier. The space around is pushed with margins. It is also worth paying attention to float: left allowing divisions to be adjacent to one line.
.list-elem-head {
    float: left;
    margin: 20px;
}
The situation is completely different for .list-elem-body . There not margins, but padding are responsible for pushing and centering relative to list element boundaries. It is because of we need full height of element .list-elem-body inside of li element for adding border border-left .
.list-elem-body {
    margin-left: 50px;
    padding: 20px 20px 20px 20px;
    border-left: solid 1px rgba(220, 20, 60, 0.52);
}
This list do no need margins or paddings. With list-style: none for li we removing default style of list.
ul {
    margin: 0;
    padding: 0;
}
One of the last changes is to offset the text with a note from the internal border of the list item.
li > span.text {
    padding-right: 20px;
}
On the end we styling button to remove task. It is span containing letter x . I do not downloading there any additional font. Although of this thanks to rounding corners, appropriate colors, padding and setting the size of the element we managed to get quite a clear-looking removal button. However, one more interesting property has been added here: user-select . This allow to omit given element on selecting. Thanks this property double clicking on text of note not cause of selecting letter x on the end.
li > div > span.delete {
    float: right;
    border: solid 1px crimson;
    border-radius: 50%;
    padding: 5px;
    width: 7px;
    height: 7px;
    line-height: 5px;
    color: crimson;
    cursor: pointer;
    -moz-user-select: none;
    -webkit-user-select: none;
    -ms-user-select:none;
    user-select:none;
}
Logic
Now we will discuss how to add to the project the possibility of creating new tasks, deleting them and displaying tasks saved in the database. If you look at the package.json , you will see the following lines:
"dependencies": {
    "http-server": "^0.11.1",
    "json-server": "^0.12.1"
  }
First of these packages it is http server that serve our app on port 8080. In this case effect is quite similar like command php -S localhost:8080 but without interpreting php script.
Second package is REST server that provide saving data to db.json file. In file README.md there are placed commands to run these servers and requests that we can do to communicate with API.
To add new task there is needed POST request
http POST localhost:3000/todo text="First One"To list all tasks from database you should send GET
http GET localhost:3000/todoTo remove n-th task send DELETE request indicating which task should be removed in url
http DELETE localhost:3000/todo/nOur initial state of db.json can looks following:
{
  "todo": [
    {
      "text": "First One",
      "id": 1
    },
    {
      "text": "Second todo",
      "id": 2
    },
    {
      "text": "At vero eos et accusamus et iusto odio dignissimos ducimus qui blanditiis praesentium voluptatum deleniti atque corrupti quos dolores et quas molestias excepturi sint occaecati cupiditate non provident, similique sunt in culpa qui officia deserunt mollitia animi, id est laborum et dolorum fuga. Et harum quidem rerum facilis est et expedita distinctio. Nam libero tempore, cum soluta nobis est eligendi optio cumque nihil impedit quo minus id quod maxime placeat facere possimus, omnis voluptas assumenda est, omnis dolor repellendus. Temporibus autem quibusdam et aut officiis debitis aut rerum necessitatibus saepe eveniet ut et voluptates repudiandae sint et molestiae non recusandae. Itaque earum rerum hic tenetur a sapiente delectus, ut aut reiciendis voluptatibus maiores alias consequatur aut perferendis doloribus asperiores repellat.",
      "id": 5
    }
  ]
}
Now we can talk about logic of application placed in app.js . Before this we need remove form index.html exemplary list elements. I mean removing everything between <ul></ul> . We modifying index.html in this way now because responsibility for managing tasks is transferred to app.js .
All script is placed in anonymous function executed after event DOMContentLoaded . It prevent to executing script before loading DOM .
document.addEventListener('DOMContentLoaded',function () {

   // there should be placed code presented below

})
Inside this function we define variables which will be used in script. There are dbUrl containing address to API managing database. And two variables with reference to form and list from DOM .
const dbUrl = 'http://localhost:3000/todo';
let form = document.querySelector('form.todo');
let list = document.querySelector('ul');
Now there is time for defining useful functions. We start from function downloading all tasks. Because of this function sends request it should wait for response. But waiting cant block rest of interface and other scripts. So by method then we adding listener of receiving response from this request. We can say that then removes himself from synchronous flow of program and starts waiting for response independent from rest of program. But because of we want to receive data from response we need receive Promise of obtaining these data. Promise is object that in constructor accepts function that argument is function to which we need pass interesting us data. It is complicated to describe but great visible in following code:
function getAllTodos() {
        return new Promise(resolve => {
            fetch(new Request(dbUrl))
                .then(res => { return res.json(); })
                .then(data => { resolve(data); });
        });
    }
But Promise is not only great thing, that you can see in these lines. Next one is function fetch . It is successor of interface XMLHttpRequest . It is different form him by better syntax, more modern approach to low level optimization and support for data streaming. Argument of fetch function is object Request . Simplest request is request with method GET to given address - it is our case. To this function we can attach listener of response by then . First then is added to wait for obtaining all response and parsing them as json . Second solves Promise returning object with data obtained by from response.
Second method that we will define allows to save task to database. In this case we also use Promise in identical way like last time, but now request is more complicated. To increase readability of code I saving it to temporary variable req . We can see that URL is the same, but in second argument of Request object we have his additional configuration: method, object containing headers and body of request.
function saveTodo(text) {
        let req = new Request(dbUrl,{ method: 'POST',
            headers: new Headers({'Content-Type': 'application/json'}),
            body: JSON.stringify({text: text})
        });

        return new Promise(resolve => {
            fetch(req)
                .then(res => { return res.json(); })
                .then(data => { resolve(data); });
        })
    }
Last function in this project do not have nothing to do with the interface fetch or Promise object, but presents other new feature from ES6 - template strings . These are character strings surrounded by diagonal single quotation mark like this “`", which can contain evaluation of JavaScript expressions designated by ${} syntax. To this function we passing object with properties id and text . Function render proper html code that will be attached to list. It is much more comfortable than using document.createElement() .
function appendTextToList(todo) {
        list.innerHTML += `
<li data-id="${todo.id}">
    <div class="list-elem-head">
        <span class="id">${todo.id}</span>
    </div>
    <div class="list-elem-body">
        <span class="text">${todo.text}</span>
        <span class="delete">x</span>
    </div>
</li>`;
    }
After defining these functions we can describe executive part of code. It begins from iterating by list of notes drawn from API and appending them to list on page.
getAllTodos().then(todos => {
        todos.forEach(todo => { appendTextToList(todo); });
    });
Then we, add a listener to the form. If you add an entry, we send it to the database, and after receiving the identifier, we attach it to the list.
form.addEventListener('submit', function (e) {
        e.preventDefault();
        saveTodo(form.task.value).then(res => {
            console.log(res);
            appendTextToList(res);
        });
        form.reset();
    });
At the end, we’re adding a listener to clicks on the list. It’s supposed to be about just deleting, so using the contains method in the class list, we check if you click on the element with the class delete. If so, we draw the id from this list element, we send the request with the DELETE method to the url terminated with this id and we cut it from the list.
list.addEventListener('click',function (e) {
        if(e.target.classList.contains('delete')) {
            const id = e.target.parentElement.parentElement.dataset.id;
            console.log(id);
            fetch(new Request(`${dbUrl}/${id}`,{ method: 'DELETE'}));
            document.querySelector(`li[data-id="${id}"]`).outerHTML = "";
        }
    })
Summary
This simple design is great as an introduction to programming in JavaScript. We have also presented CSS elements here, which show that you do not always need to use bootstrap to get attractive looking inputs and lists. If you have any questions after reading this text, do not hesitate and ask them in a comment.